With this tutorial you can easily insert a button facing into a shoulder seam. Especially for baby clothes ist reasonable to insert button facings at the shoulder seam as they have proportional a bigger head. So it’s easier and more confortable to change your kids clothes.
What do you need
• Your sewing pattern
• Your fabric
• Measuring tape or a ruler
• Roller cutter or a pair of scissors
• A piece of cuff fabric or jersey
• Thin fusible interfacing (H 180)
• Snap fasteners for jersey and the corresponding tools
Instructions
1
Cut out all pattern pieces following the pattern instruction, BUT extend the neckline cuff by 2 cm.
2
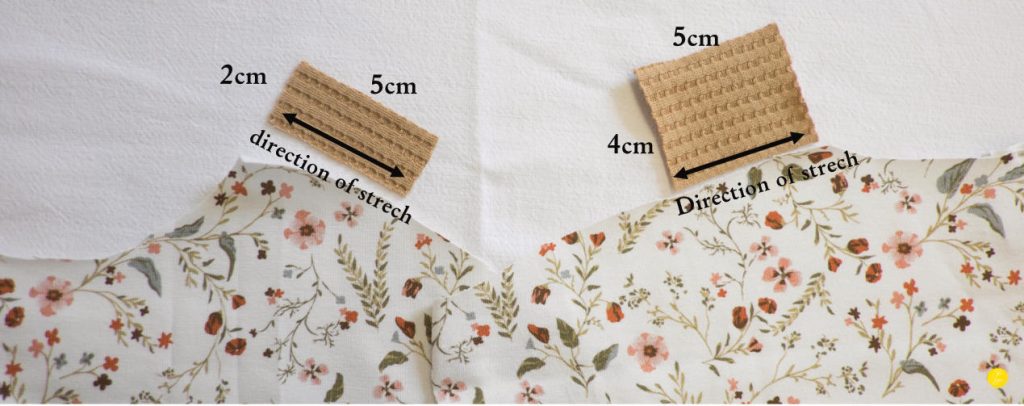
Additionally you need two pieces of cuff fabric or jersey.
• 2cm by shoulder width or 5cm (strech in direction of 5cm)
• 4cm by shoulder width or 5cm (strech in direction of 5cm)
3
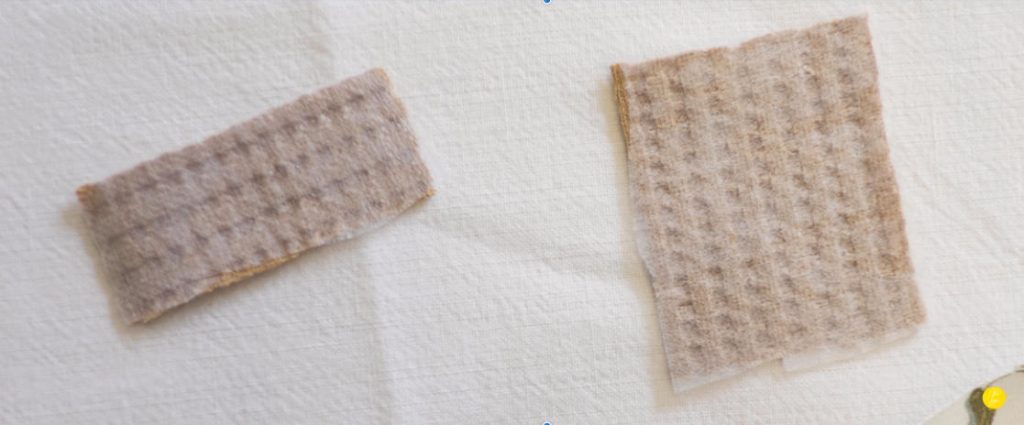
Fuse on both pieces fusible interfacing so the buttons won’t tear out
4
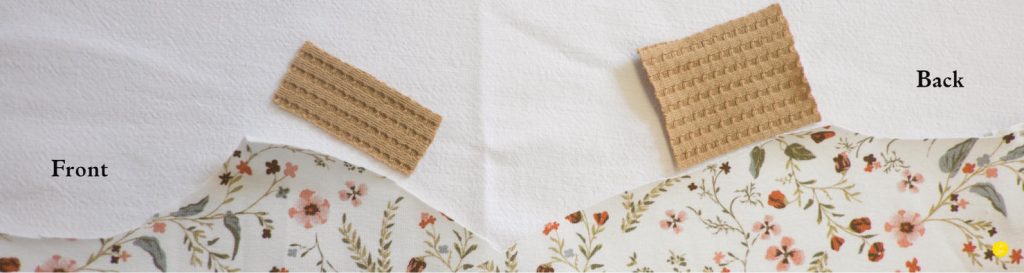
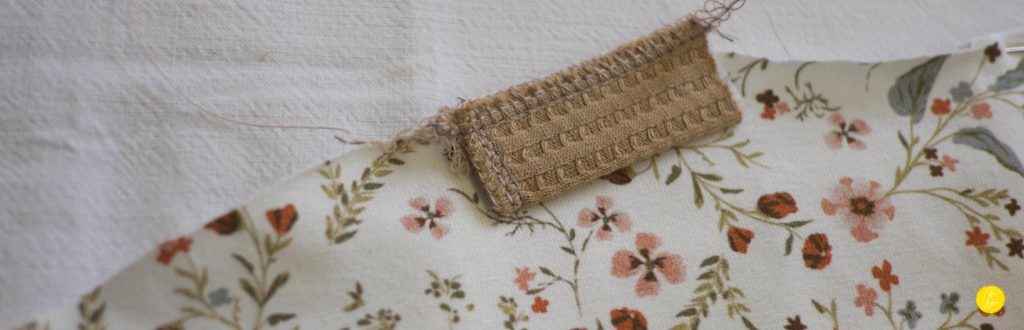
The button facing is always on the left shoulder. So place your front- and backpiece in front of you facing with the right sides. Now place the 2cm piece on the front shuolder and the 4 cm piece on the back shoulder.
5
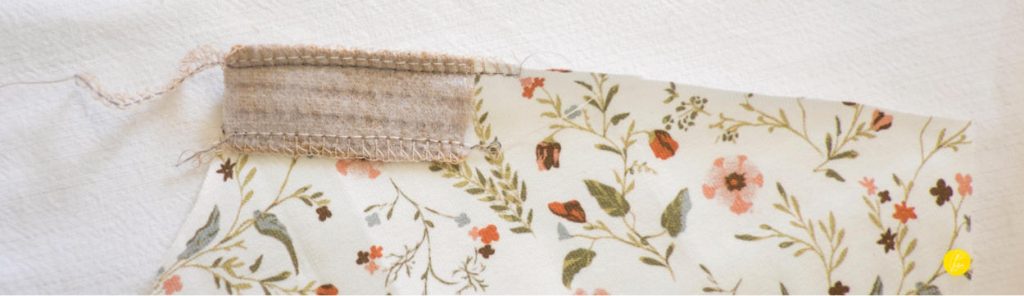
Initially serge the outer edges of both pieces.
Pin the 2cm piece on the shoulder and sew it on.
6
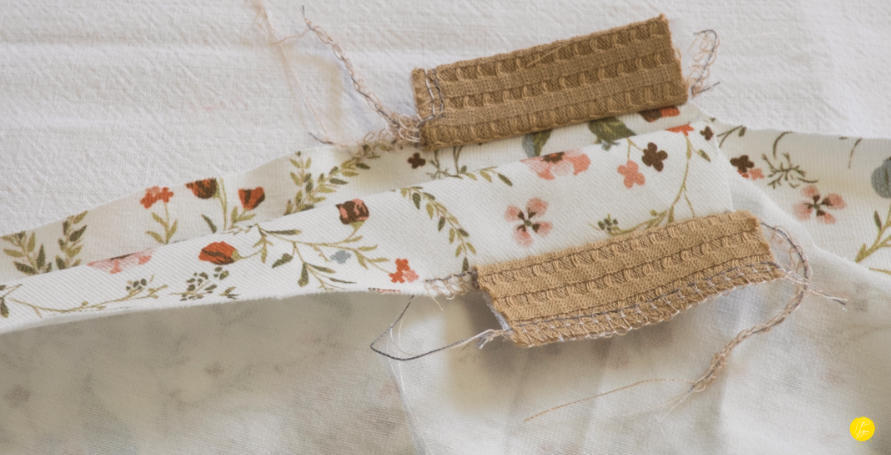
Fold in half the 4cm piece and pin it with the open edges on the back shoulder and sew it on.
7
Fold both pieces including the seam allowance outward. Place front and backpiece on top of each other facing right sides together.
8
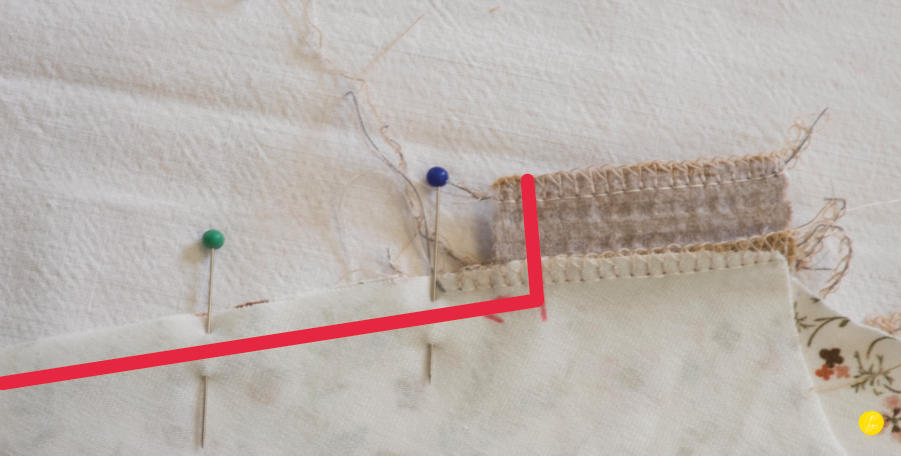
Close this shoulder seam like the red line indicates. Then close the other shoulder seam.
9
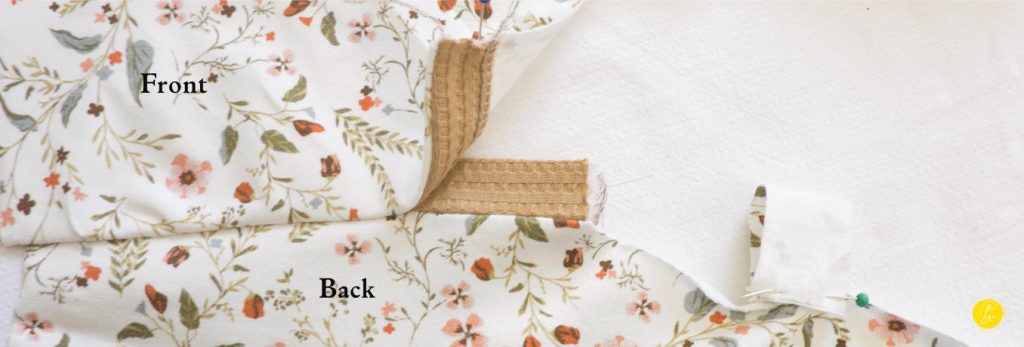
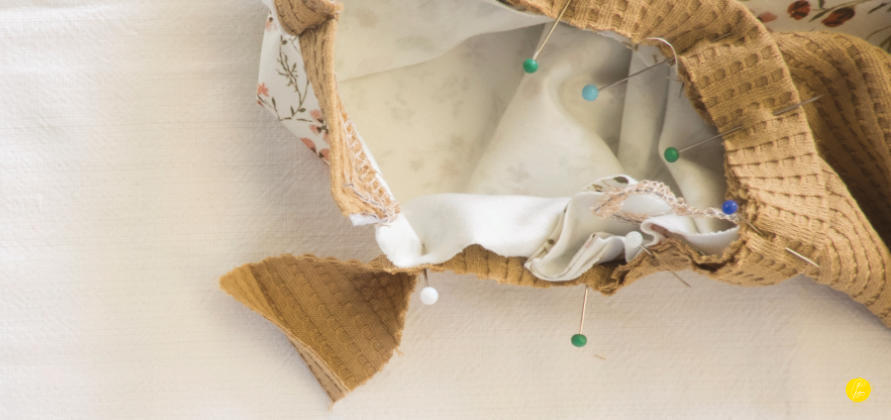
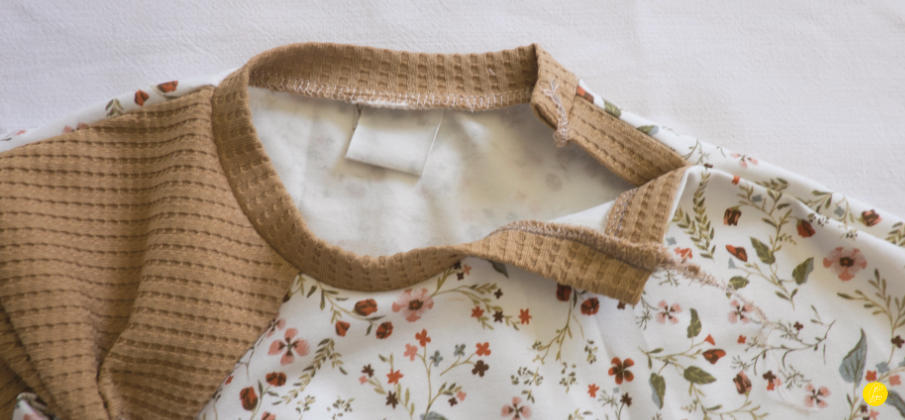
Fold the 2cm piece along the edge inwards. And the 4cm piece will automatically follow into the frontpiece. Iron the seam allowance into the front piece.
10
A next step pin the neckline cuff all around the neckline. Fold in the remaining seam allowace at the open edges and sew it on. Sew up the beginning- and the end thread
11
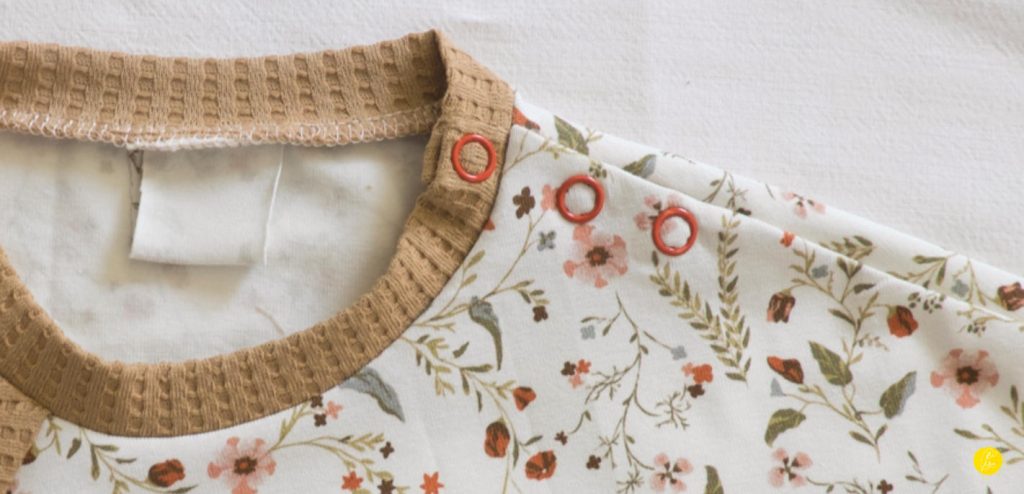
Attach 3 snap fasteners.
I hope this tutorial is helpful for you. Here you can also download the tutorial in either english or german: